Showing posts with label DIY. Show all posts

3/2/13

DIY - earring holder/display

Hello lovelies,

I have a new DIY for you all and I personally love this one. I got the idea from beautysplurge on YouTube.

What you will need:

• a picutre frame
• a mesh backing/crosshatch placement (that is what I used)
• a pen/pencil
• scissors
• a hot glue gun
• ribbon/decorative paper

Step1:
Measure your backing by placing it against the back of your frame and mark the outline with a pen/pencil.

Step2:
Cut out your background.

Step3:
Time to glue your background to the back of your frame. Glue as you go and I also like to press down on my backing after I put the glue, just to ensure that there is no space between my frame and backing.

Step4:
Let the glue dry.

Step5:
Use your ribbon or paper to cover up the edges of your backing, to make it more aesthetically pleasing to look at.

Step 6:
Add your favourite earrings!

All done.
I hope you all like this tutorial and comment below if you try it!!

xoxo
annpaige

12/8/12

My platinum journey - brunette to platinum blonde (before and after)

Hello lovelies,


Looking back at all of my posts, my bleached locks to ash blonde hair (which I have now deleted due to the quailty) post, is still one of my most read posts and it isn't even very informative. With that being said I thought it would be a great time to give you all an update and explain my full journey with pictures for those interested and who may also be trekking on the same journey as myself.

Last year in the summer and I guess fall/winter as well my hair was quite dark from dying it. My hair was a medium to dark brown and I wanted a change, so in December I went to the salon. I told the hair dresser I wanted gorgeous golden blonde hair like Kristin Cavalari and that did not happen at all.

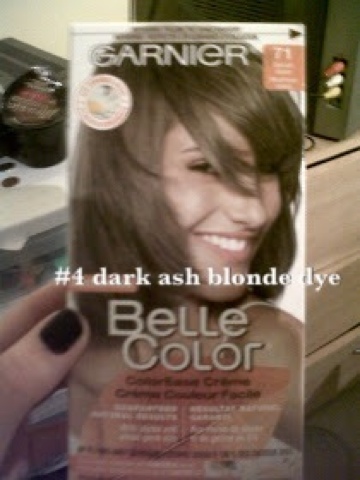
My hair was an orange colour, mind you the lighting makes it look much nicer then it was. Not being happy with the results, I took matters into my own hands and bought a boxed dye. I bought a a dark ash blonde dye - Garnier #71 dark ash blonde - and I got a really nice dirty blonde colour.

To maintain and lighten my hair (because I wanted more of a light ash colour and also get rid of the orange tones) I started to use Joico color endure purple shampoo and conditioner once a week and left both in my hair for 15 minutes in the shower. I would and still do my roots about every 5-7 weeks. Back then when I would do my roots I would do everything (all of my hair) with a boxed dye (L'Oreal Excellence cream AA01 ultra light ash blonde), making my hair lighter every time. I would also tone my hair after dying, using wella color charm T18 or T14 (alternating each time). The Joico shampoo and conditioner worked amazing and lasted me about 8 months. When I ran out I started to use "light blue" purple shampoo and that also worked pretty well for a drugstore product (from shoppers or Walmart).

Still wanting my hair to be even more platinum I went out and purchased clairol shimmer lights purple shampoo and it is so comparable to my Joico shampoo that I used to use, but less drying on my hair. I now leave the shampoo in my hair for about 5 min (longer than 8 will turn my hair a purple/silver colour). For conditioner I now swear by the Organix brand sold at wal-mart and shoppers. I don't stick to a specific Organix conditioner, I get a different one every time and I leave it in my hair for 5-10 minutes, or longer if I have time. This conditioner makes my hair tangle free and so silky smooth every time, I LOVE it!!! In the summer (because my hair wasn't light enough) I did an over all bleach (L'Oreal extra bleach blonding kit #205) and my hair went to a Barbie blonde. To get rid of the brasiness I just kept on using my purple shampoo (shimmer lights) every time I washed my hair.

More recently now when I need to do my roots I have started to use bleach and the bleach I am currently using is the Ion color brilliance Creme lightener with ion 9% 30v developer and I leave it in for approx. 70-75 min. I leave it in a bit longer because my hair does not take to dye very easily (after such a long amount of time my roots are still a golden colour, they don't ever really get to that pale yellow, with bleach alone). After that I condition and blow dry, then tone. I now prefer the T18 toner and after bleaching I leave the toner on my roots for 30-40min and then I add it to any parts of my hair that need a little pick me up for the rest of the 20min.

So this is the before (brown) and the after (platinum). In total the amount of time it took me to get this colour was approx. 9 months (August). (Sorry there are so many pictures, but I wanted to show my full journey and the products I have used along the way).


I hope that this post has helped any of you trying to go blonde, or that it has given you some helpful tips if you are already blonde. I will also do a post next week with my everyday products that I use to maintain and keep my hair healthy. Thankfully I have never had my hair snap or get damaged and I usually only trim my hair once every 4 months or when needed.


*disclaimer - I am not a professional, these are only tips and tricks that I have acquired along my journey. I am not telling you what is right or wrong for you and your hair. Please consult a professional for the best products for your hair type, if your are unsure*


Thank you all for reading and if you have any questions or I have missed something please leave a comment below.


xoxo
annpaige

10/5/12

Berry Fall nails - DIY

Hello lovelies,

I have been searching for the perfect nail colour for fall and just could not find exactly what I wanted, so I made my own and wanted to share with you all how I did it.
I first found a bottle that was on its last breath with hardly any polish left in it. The bottle I started with had a very light tan colour in it, but you don't have to start with the same colour. I do however recommend you use a neautral base or get an empty bottle.

I then mixed all of the colours in the picture above. You don't have to use the same brands, just use whatever you have at home in the same colour.

- 799 Plum night by Revlon

- 426 by wet n' wild (no name); a bright fuscia colour

- 131A by NYC; red

- 260 gold silk by Rimmel

I just eye balled it and kept mixing until I got the right colour. With this combination there is really no way to mess it up. If you want more of a pink berry add more red and fuscia. If you want a deeper berry then add more purple.

I hope you all liked this post and let me know what your fav fall nail polish colour is and also if you try this diy!!!

follow me on twitter for daily updates

@annpaige

xoxo

annpaige

8/22/12

Product Review: Bleach


Hello lovelies,

I have been wanting my hair to be a lighter blonde for a little while now and it was root touch up time so I decided to try a new product.
L'Oreal Feria
Extra Bleach Blonding
Intense 1 step Lightening System colour 205


If you have dark brown - black hair I would not use this product, go to Sally's and buy each product needed separately.

The box came with two packages of lightening powder, 20V creme developer, one bottle of shimmering oil and conditioner to rinse everything out.

Because the box only came with a 20V I had to use my own 30V knowing that the 20V wouldn't work.

I mixed the two bleach packages with the creme developer and added the whole bottle of the oil and mixed everything together. Because my roots were dark I started to apply the bleach to my roots first and left it for 40 min and then applied to the rest of my head for 30min, with a total of 70min. I waited until my hair was a pale yellow without leaving it on for too long.

After bleaching I toned my hair with wella colorcharm T18 and it got rid of most of the yellow tones. Now once a week I am using my purple shampoo to gradually lighten my colour more to a lighter platinum colour. I am currently using Light Blue Shade purple shampoo from my drugstore, but have run out and I am going to start using Clairol Shimmer lights.
(pictures were taken before using purple shampoo, so my hair looks more platinum now than in these pictures)

Overall a good product if your hair is a dark blonde to light/medium brown because the 20V wont lift your hair enough if it is a darker colour.
For my next root touch up instead of using this product I am just going to buy bleach and more developer and use that instead, because its much cheaper in the long run.


I hope you all enjoyed this review and that it was helpful for anyone trying to lighten their blonde hair or to go blonde.

Follow me
Instagram @annpaige_
Twitter @annpaige

xoxo
annpaige

8/7/12

Ombré nails: white and green

Hello lovelies,

So my nail polish started chipping away and needed a big pick me up. Since I have some time off from work (and my nails won't get ruined) this week I thought why not try something new. I really was just going to paint them white and then I saw some ombré nail designs on YouTube. I looked through my nail colours and thought what I have not used in a while GREEN. Here is what I came out with a well as the products I used.

What you need:

Clear/base coat
2 colours in the same family one dark one light
Sponge
Cotton swabs and
nail polish remover

Step1: apply clear/base coat to protect an prime your nails- I used Sally Hansen Xtreme wear in 100 invisible

Step2: apply white nail polish - I used NYC 134 French white tip (had to apply like 3 coats because it is so thin)

Step3: paint the bright green onto a small sponge and dab onto nails 1/2 way down

Step4: paint darker shimmery green onto sponge and dab onto the tip of your nail covering any spots left from the brighter green

Step4: before everything dries apply your clear coat to blend and smooth out your ombré design

Step5: remove any excess nail polish on the skin and cuticles with cotton swabs


You are done!!!

I hope you all enjoyed this post, I love my ombré nails!!! Also let me know in the comments if you want to see more posts like this and PLEASE answer my new BLOG POLL on the top right of the page. I really want to start blogging more often again and I have so many ideas but really need your helping putting them all together. Thx!!!


follow me
Twitter @annpaige
Instagram @annpaige_

xoxo
annpaige

3/24/12

Mint outfit of the day

Last night my boyfriend and I went to go see The Hunger Games and it was really good, definatley want to see the next one!!!!

Here is my outfit:

Jeans: garage
Mint tee: Ricki's
Cardigan: garage
Pearls: DIY
Earrings: fr21

Hope you all have a good morning!!!

If you like this post please follow with GFC or bloglovin', and also answer my poll at the top right of the screen to help me to better improve my blog. Thanks!!!!


xoxo
annpaige

3/13/12

Cute Clutch DIY

Today I was at Vervegirl magazine for a fun ducktape DIY with the girls!!!

Here is what you need:
Duck tape roll - in as many colours or patterns as you like
Duck tape sheets - again in different colours and patterns
Velcro
Your fav embellishments: jewels, buttons etc...


Instructions:
(I apologize if the pics are not in order I'm posting this from my iPod, hopefully I can fix it for you all by tomorrow)

Step 1:
Pick 2 different sheets of the same colour/design and a roll of duck tape in a contrasting colour

Step2:
Peel off one design and stick it on the back of your other sheet design (do not stick both tapes together, leave the backing on one so you can fix any bubbles)

Step3:
Lay one sheet partly on top of the other and make a border on all four sides with your duck tape roll
Step4: Cut off about 3 inches off one end to use for your pocket and redo your border on this end.

Step5:
Fold your sheets in the size that you would like your clutch to be

Step6:
Cut your end piece to the desired size of your pocket and make a border around in it with your duck tape roll

Step7:
Place your pocket in the desired position and inforce with a duck tape border

Step8:
Cut 4 pieces of Velcro and place two on the inner top fold and two on the bottom fold

Step9:
Tape the sides of your clutch around the border to keep your clutch closed

Step10:
Add any jewels or embellishments


Please leave me your comments on this post below and let me know if you like this post let me know your experiences if you try this for yourself.

Thanks for reading and please follow me with GFC or bloglovin', you can also follow me on twitter @annpaige.
And check out www.vervegirl.com I loved and continue to love working with theses ladies!!!!

xoxo
annpaige

Featured Post

My platinum journey - brunette to platinum blonde (before and after)

Hello lovelies, Looking back at all of my posts, my bleached locks to ash blonde hair (which I have now deleted due to the quailty) post,...